2/3rds of programming projects expected to use “low code” tools by 2025

App Inventor is a “low code”, visual software development tool. Such “drag and drop” programming tools enable non-programmers (and programmers) to create many types of applications without the details of traditional programming code.

This leads to an important issue – will less trained/less experienced programmers inadvertently introduce security problems in their applications?

Gartner predicts that by the end of 2025, over 65% of development projects will use low-code builders. The field of low-code continues to expand. But what security implications does low-code introduce?

Low-code refers to tools that enable application construction using visual programming models. Adopting drag-and-drop components instead of traditional code, no-code and low-code platforms enables non-technical folks to construct their own workflows without as much help from IT. Yet, handing power to citizen developers with less security training can be risky. Plus, low-code platforms may hold compromised propriety libraries or leverage APIs that may unknowingly expose sensitive data to the outside world. There’s also the possibility that low-code could increase shadow IT if not governed well.

How to Mitigate Low-Code Security Risks

Reminder: Visit Learn2c.org for the newest App Inventor tutorial content

Reminder: the web page at https://appinventorplus.wordpress.com has moved!

For those still using this old web page, please use the new web address at

learn2c.org

The new address is much easier to remember and to type! Several months of new content appears at learn2c.org that is not present here.

New web address Learn2c.org

To make accessing this web page easier, I created a new web address for my App Inventor “how to” web site:

The name is short for “Learn to Code”. A short URL makes it easy to visit the web site!

I duplicated the old web site at the new address and everything looks the same. The new web site is “live” now although I will still be posting here for a bit.

I will keep you updated on the switch over, perhaps later in the week. But go ahead – check out the new web site – it is up and running now!

By creating a new web site, the two older web sites will remain online. All links from Facebook, Twitter, Google+, Tumblr and personal pages will still work and point back to the original articles from when they were first posted.


An App Inventor recommended way of handling multiple similar screens

MIT App Inventor supports apps having multiple screens, but due to the way that App Inventor is implemented, they recommend that apps have no more than 10 screens total – or risk running out of memory or seeing the Blocks editor crash or hang!

They have a page of information about this issue and you should look at that if you are writing an app with more than about 10 screens.

They suggest it may be possible to simulate multiple screens using just one extra screen, depending on the application. They provide hints as to how to do those hints may be insufficient for new App Inventor programmers.

A reader asked for help on this so I created this tutorial.

Since this app has two screens, this tutorial is split into two sections, one for each screen, and then a third section discussing optional modifications.

The basic app is called ManyScreens. The optional modifications are in ManyScreens2_Buttons (source code links at end of this post)

User View

This demonstration app features 4 buttons – the first button displays “Screen 1”, the second button displays “Screen 2” and so on. These buttons could have any label on them appropriate for your application, such as “Register Account”, “Reserve a space”, “Display reservations” or what ever make sense for your app.

Pressing Screen 1 displays this screen – note the label at the top and the photo on the page.

This screen appears when pressing Screen 3. Note that the text label references Screen 3.

The button Do Something! is a placeholder for adding code to do something unique for this screen. For this application all it does is close the screen and return to the main app screen, Screen1.

Continue reading

How to center an image on the screen using App Inventor

A reader asked, “How can I center an image on the screen in an App Inventor app?”

There is an easy way to do this and there is a more complicated method (using the Canvas and other graphics objects). In this tutorial, we show the easy way to center an image on screen!

Our app uses the camera to take a photo and then displays that photo on screen. A secondary feature of the app demonstrates how the “image object” in App Inventor is the filename where the image is stored. In this way, the “image object” can be stored in TinyDB – its not really the binary data representing the photo or image – it is, in fact, just the filename. (TinyDB only stores text).

User Interface View

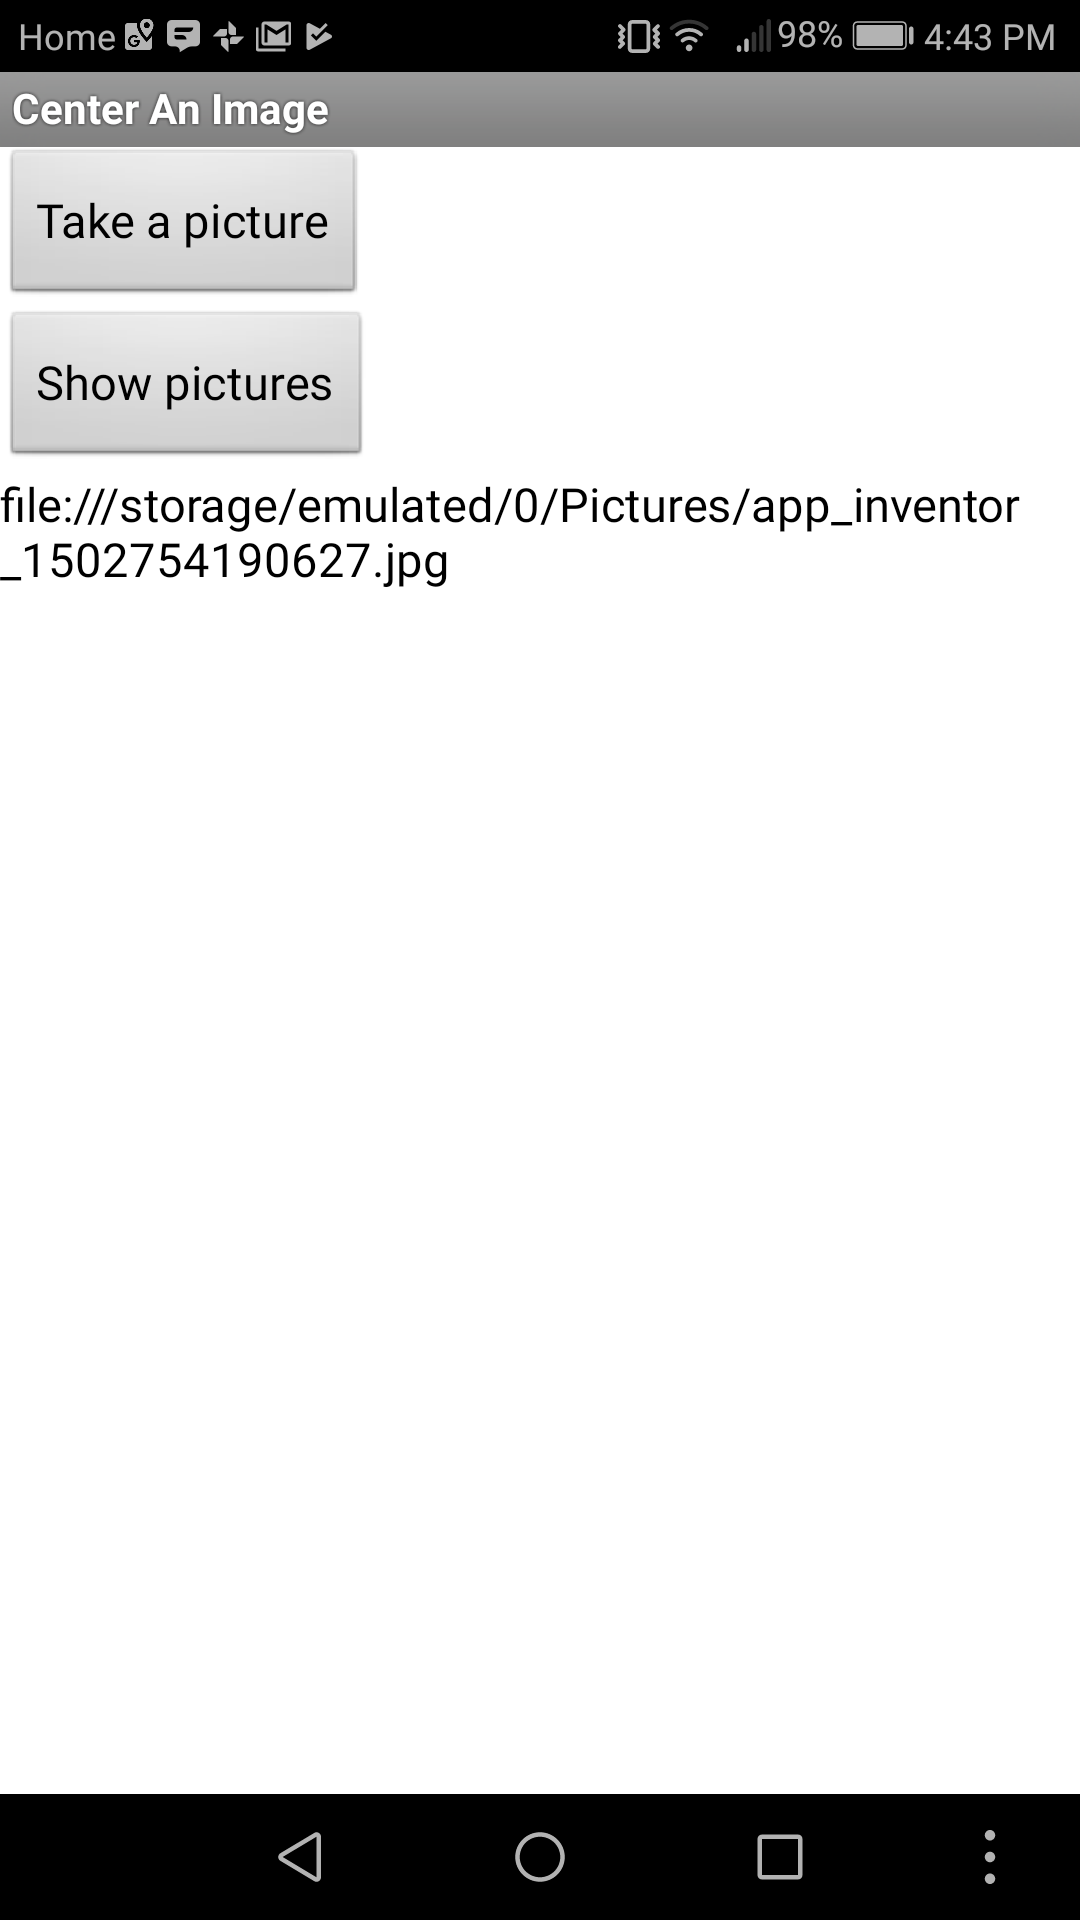
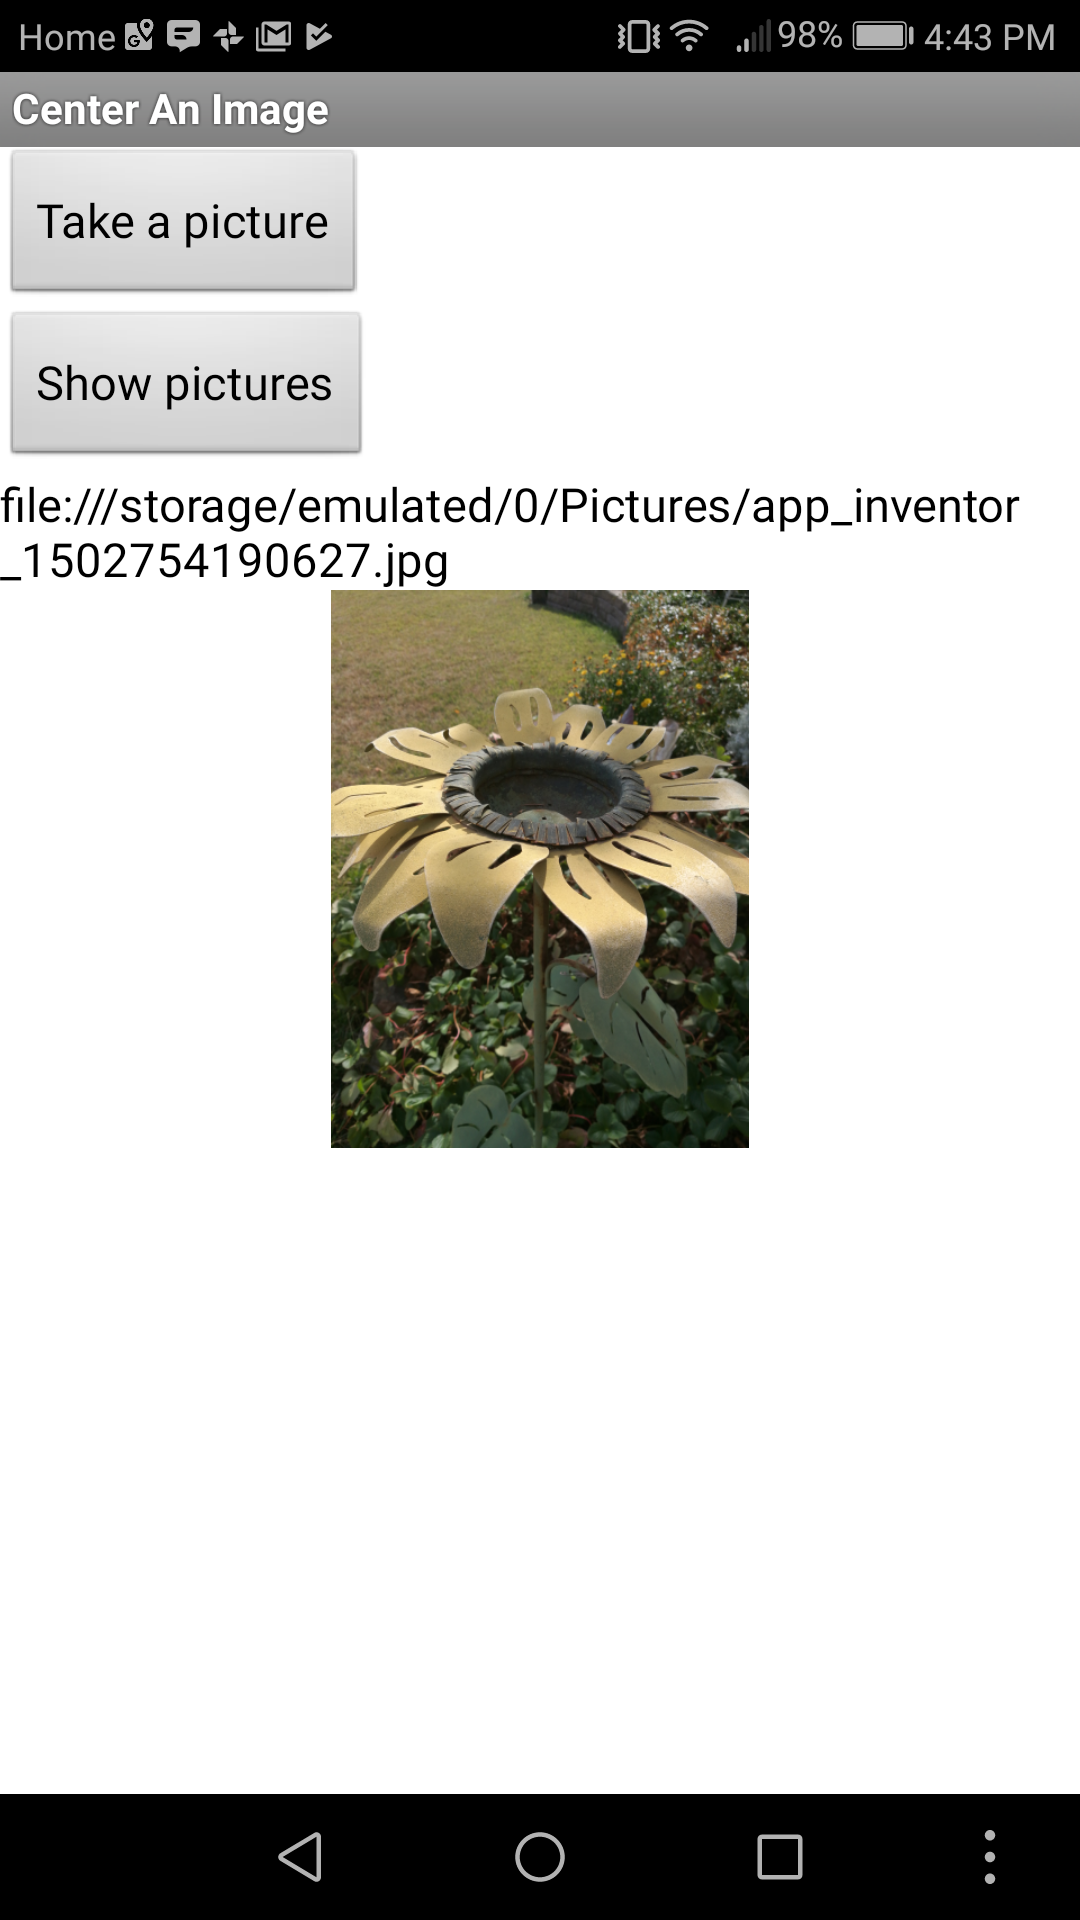
To demonstrate image centering, we use the camera to take a photo (creating the image) and then a Show pictures button to display the image on screen.

When you press Take a picture, the app launches the Android camera app to take the photo. When done taking the photo, click on the “check mark” (as it appears on my Android 7 phone) at upper right of the screen. The camera app returns to our app, which displays the file name and location on our Android device where the JPG image file has been stored.

Press “Show pictures” to display the photo. The default image size is small – but centered! We will see how to show the photo at a larger size.

Designer View

Continue reading

Can App Inventor have a button or control that rotates on screen?

A reader asked: Is there is a way to have a control, such as a button, rotate on the screen?

With a simple trick, the answer is Yes!

The trick is to use ImageSprites that are made to look like buttons. Then, instead of .Click event handler, as used on a Button, we use one of the “touch” events defined for the ImageSprite class. To rotate the sprite, change the sprite’s Heading property. Easy!

If you would like to learn more about ImageSprites, please read my online tutorial “Using ImageSprites for animated App Inventor Graphics”.

I’ve also written an inexpensive 227 page e-book all about graphics, animation and charts available from many online e-book outlets. You may find that text helpful to you as well.

Tutorial Video

The tutorial is shown here as a video – or page down for a written version of the tutorial.

User View

Watch this video to see what a rotating button looks like:

Designer View

Creating the user interface is the same as creating other App Inventor user interfaces – except we use a graphical drawing area called the Canvas and add an ImageSprite to the Canvas.

Continue reading

Interesting questions :)

I am back after having been traveling for over 2 weeks (and some travel before that too); during most of that time, I had no Internet or cell phone access.

While I was away, readers sent me questions about how to do various things in App Inventor and I will start working on creating tutorials to answer their questions. I think others will find their questions and possible solutions to solve the problems of interest!

Another reader indicates their’s been a change to the Google Fusion tables API and I will try to look into that and see what’s up.

Google introduces Blockly 1.0 for Android, iOS and web

If you have used MIT App Inventor (and of course you have!), you can quickly adapt to using Blockly for programming.  Blockly is basically a “Drag and Drop” code editor (like in App Inventor), providing a visual programming system. It uses the same ideas as MIT App Inventor.

To see it in operation, visit MIT’s Scratch project to create a simple program.

Google has released code libraries that, when combined with other tools, enable use of Blockly to create code for the web, for iOS and Android. For iOS you also need XCode and for Android you need Android Studio. Blockly is not a programming language itself; it outputs code in JavaScript, Python, Lua and other formats.

Source: Google Developer’s Blog

WATCH THIS VIDEO!

(FYI I am half way through my period of traveling too much and not getting much programming done!)

Brief update

I’ve been busy with other projects, traveling for work, and other tasks, that have cut into my App Inventor posts. Sorry about that!

One task I have been busy with is a project from AV8 Designer LLC to create an aircraft wing tip protection system. The system places proximity sensors on the tips of aircraft wings to detect – and help prevent – collisions with obstacles during aircraft ground movement operations. Aircraft are pushed and pulled around on the ground during all times of the day and night, and during all types of weather. They are frequently squeezed into aircraft hangers and parked extremely close to other aircraft. Unfortunately, this leads to occasional wing tip collisions that are expensive to repair.

The wing tip sensors provide audio and visual alerts of potential collisions and status (with audio and visual display) on Android tablets or smart phones carried by ground crew. The Android app is simple to use but incorporates complex programming to wirelessly communicate with all wing tip sensors. The app and the wireless communication links were implemented using App Inventor, rather than the Android Java SDK.

We took a risk in choosing to use App Inventor. While preliminary experiments were done to verify the concept, we did not know if we could develop the full application in App Inventor. Well, we took the risk and everything worked out great. Using App Inventor we were able to quickly develop – and demonstrate – the user interface and functionality. In doing this project, we proved App Inventor is capable of creating powerful and complex industrial applications. App Inventor can do much more than only educational and gaming applications!